Choosing a Google Maps extension
There are a great number of Google Maps extensions available in the Joomla Extension Directory. We encourage you to experiment, research and decide which is best for you.
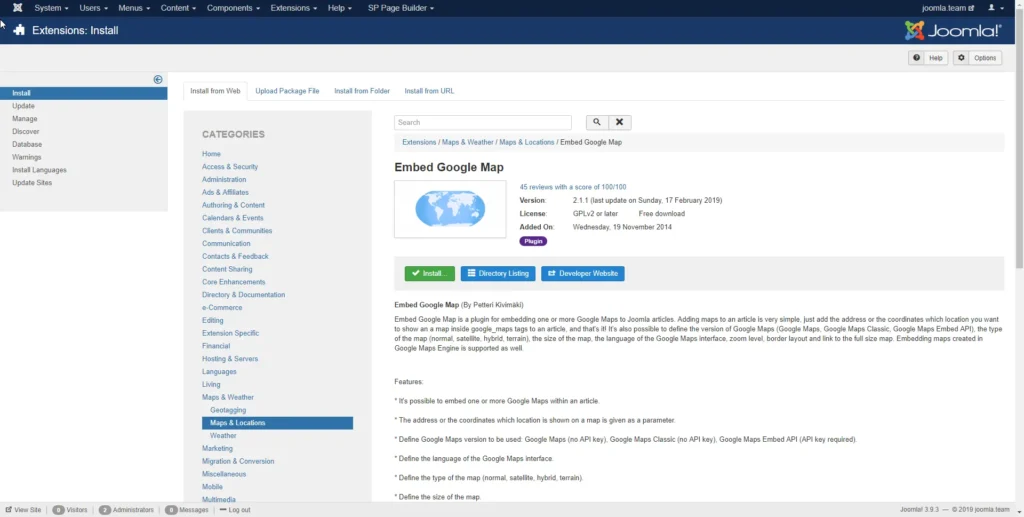
However, for the purpose of this article, we will be using the Embed Google Map plugin by Petteri Kivimäki. You can find and download this extension from the JED here.
If you’re unsure about how to install a Joomla extension, we suggest you start by reading our wiki article How to find & install a Joomla extension.
Installing the plugin
We’ll take the quickest approach and use Joomla’s native Install from Web feature to install the plugin directly through the Joomla backend:
- Log in to the backend of your Joomla site
- Go to Extensions > Manage > Install
- Search for “Embed Google Map” and select Embed Google Map from the results

Installing the plugin
Enabling the plugin
Once the installation is complete, we need to quickly enable the plugin to make it available for use:
- In the backend, go to Extensions > Plugins
- In the list of plugins find our plugin: Content – Embed Google Map
- Click the small [x] icon next to the plugin to enable it
Congratulations, you’ve enabled the plugin and now it’s time to add a Google Map to your website!
How does the plugin work?
Most extensions have their own documentation – or at least some frequently asked questions – to help you get started and understand how the extension works.
Typically you can find a link to the documentation on the JED. You can find the documentation for this plugin on GitHub.
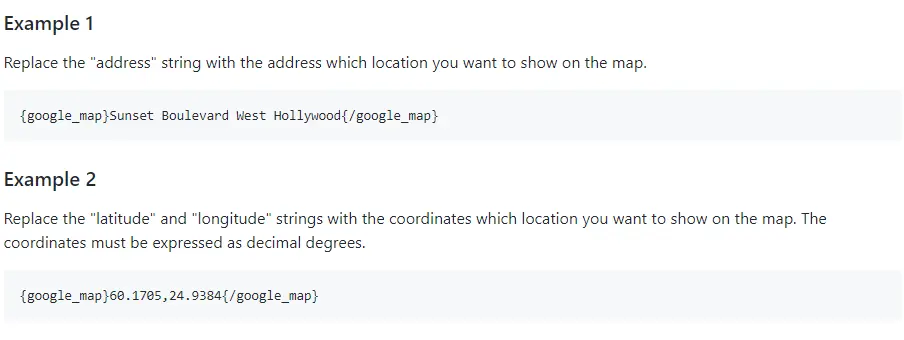
There you’ll find the following explanation of how to embed a Google Map within your website:

Embedding a Google Map
To embed a map we need to insert a tag in the form {google_map}...{/google_map} in the place we would like the map to be added.
Between these tags we need to provide the address (or coordinates) of the location. We can also optionally add a variety of other settings to easily configure the embed.
Let’s try to add a map!
Adding a map to a Joomla article
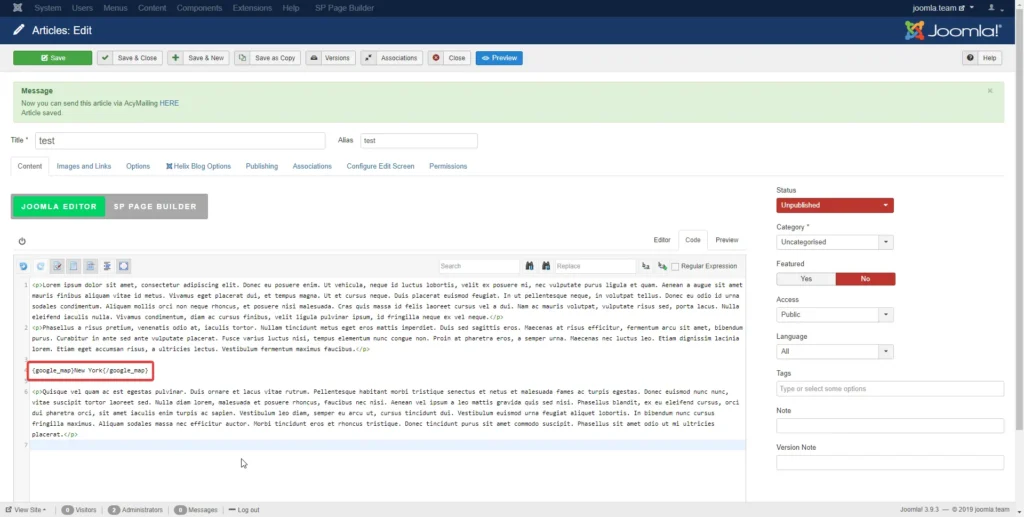
Find the article you want to add the map to and open it in the backend. In the article editor, enter the following within the article text:
{google_map}Your desired place{/google_map}

Now save the article, open the relevant page on your Joomla site in a separate tab in your browser and…voila: you’ve successfully added a Google Map!
I’ve added the map, what next?
If you would like to further modify the appearance of the embedded map there are lots of options you can tweak to your liking.
You can change the zoom level, map theme, map size, appearance of the pins, etc. These settings can either be changed:
- For all maps: within the plugin itself, by modifying the default settings for this plugin
- For one map: by adding additional text between the {google_map} tags
Details of how to configure these settings can be found in the plugin documentation. Have fun tweaking! You can also add additional Google Maps within the same – or different – articles in the same way.
Final thought: Google alternatives
Although Google Maps is widely accepted and trusted, if you need to use a different service there are several alternatives to Google Maps that you can try and use.
One example is OpenStreetMap, a fully open source Google Map competitor. There are several well-supported OpenStreetMap extensions for Joomla, for example OSModul by Martin Kröll. These work very similarly to the plugin discussed above.


